Maven use in Selenium
Why should we use maven?
Whenever we build any project we need to depend on jars of different companies. Let’s say I want to read excel sheet, then I need to download jar for excel read. If I want to have testNG feature, then again, I need to download same from google or any other source.
By using maven we don’t need to do all this. Maven is a repository where they stored every technology, which comes to our project just by specifying minimum configuration. This is very useful as supporting jars will also be downloaded.
Maven
Below given points can be concluded about maven:
Maven is a powerful project management tool that is based on POM (project object model). It is used for projects build, dependency and documentation. It simplifies the build process like ANT. But it is too much advanced than ANT.
Maven is a “build management tool”, it is for defining how your .java files get compiled to .class , packaged into .jar (or .war or .ear ) files, (pre/post)processed with tools, managing your CLASSPATH, and all others sorts of tasks that are required to build your project.
To use Maven, add Maven plugin to eclipse. Latest eclipse has it in built so need not to worry.
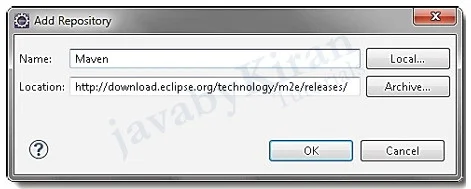
Help → Install new software → Click on Add.
In the “Name” box type ‘Maven‘ and in the “Location” box, type http://download.eclipse.org/technology/m2e/releases/
As a QA person we need to know maven first, then second step will be executing test cases through maven.
Maven Building Tool
Now we will do below tasks just to have knowledge of the maven building tool.
Create simple maven project.
Running a simple Java code.
In our case we will check if any user input string is a number.
Using class StringUtils [pre-defined] have in common-lang3.jar library to check if a string is a numeric.
Configuring Maven for a project to use common-lang3 library. Instead of traditional way: Copy library into a project and setting build path in eclipse.
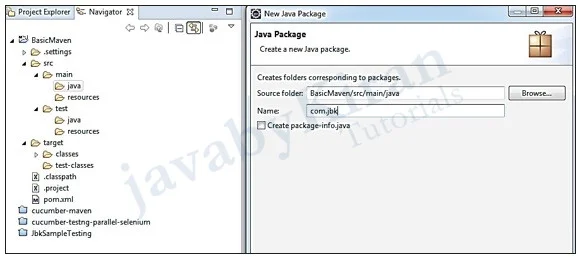
As we already added maven plugin, we can create a maven project. Go to new project and select maven project as below:

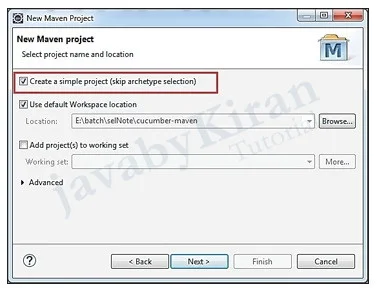
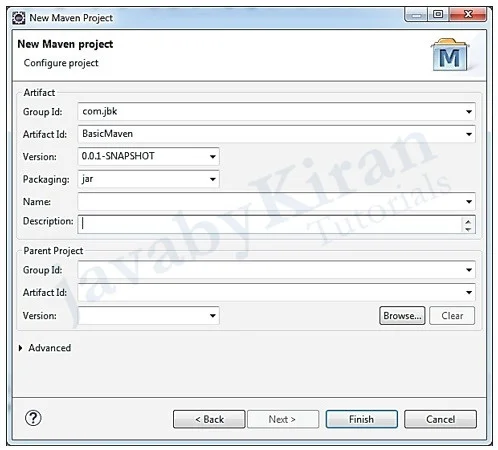
Click on finish. You will see a structure like this.
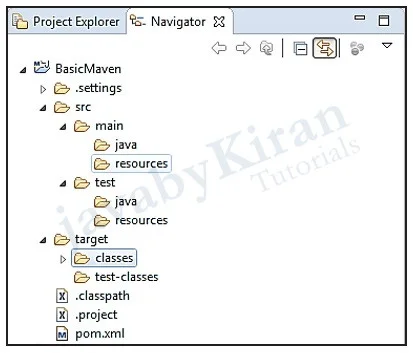
Create a package in java folder.
Pom.xml will look like:
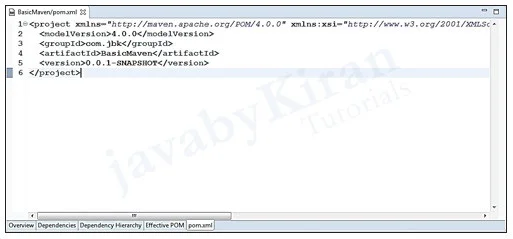
Adding Dependency
Now add dependency in “pom.xml” as shown below:
<project xmlns="http://maven.apache.org/POM/4.0.0"
xmlns:xsi="http://www.w3.org/2001/XMLSchema-instance"
xsi:schemaLocation="http://maven.apache.org/POM/4.0.0 http://maven.apache.org/xsd/maven-4.0.0.xsd">
    <modelVersion>4.0.0</modelVersion>
    <groupId>com.jbk</groupId>
    <artifactId>BasicMaven</artifactId>
    <version>0.0.1-SNAPSHOT</version>
    <dependencies>
        <dependency>
            <groupId>org.apache.commons</groupId>
            <artifactId>commons-lang3</artifactId>
            <version>3.3.2</version>
        </dependency>
    </dependencies>
</project>
This is added because we want commons-lang3 jar in our project. We can download that separately, but in this case maven will help us to integrate that jar in our project.
Highlighted one is from maven website. Search in google “ maven dependency for common lang jar”

See highlighted one, we are getting mvnrepository.com website, there all dependencies are listed as below picture:
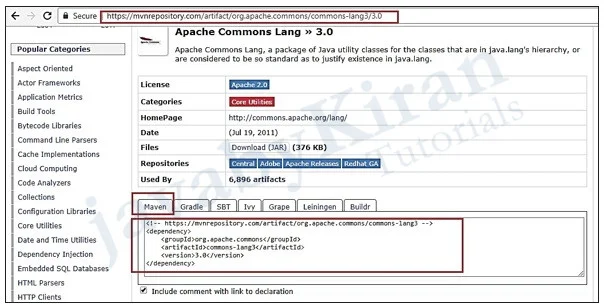
As soon we will save pom.xml changes automatically jars will be downloaded and project structure will be as below:

Above highlighted one shows the jar location.
Now this location is local repository and mvnrepository.com is remote repository.
Next time whenever we will create a new maven project and if we need same jar, then maven first look into this location that is local repository, if it already exist then it will not download from the remote repository.
Now we will create Java class for checking numeric no. but it is not test case just a Java class with main method.
package com.jbk;
import org.apache.commons.lang3.StringUtils;
public class NumericNumberChecking {
    public static void main(String[] args) {
        String text1 = "0123a4"; String text2 = "01234";
        boolean result1 = StringUtils.isNumeric(text1);
        boolean result2 = StringUtils.isNumeric(text2);
        System.out.println(text1 + " is a numeric? " + result1);
        System.out.println(text2 + " is a numeric? " + result2);
    }
}
Now structure looks like this:
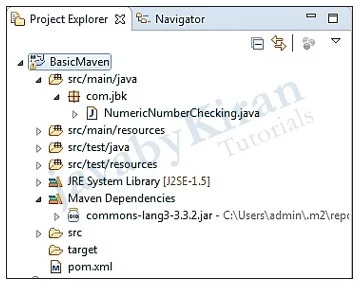
Now we can run this program the same way we run all programs by maven. Just observe target folder before “maven install” option.
Select “Maven Install”

After this we will see in console as below:

After doing refresh below given window is shown:

On above screen we can see our project is packed as a jar now this can be used anywhere. If you want to run this, right click project and run as a Java application.
Operating Principles of Maven
Above we have created a project and ran flawlessly. In the project we are using “StringUtils” class which is a class of Apache and is not in the standard library of the JDK. Traditionally we have to copy this library to project and declare the classpath.
However, the guidelines says that we do not have to copy and declare classpath in the traditional way. The library was managed by Maven management. Now the below image shows how Maven works:

The illustration above shows how the Maven works.
We will declare in the “pom.xml” that project depends on common-lang3 library version 3.3.2.
As soon as you SAVE the “pom.xml” file, Maven will check if this library has a local repository on your computer yet. If it does not have then Maven will download it from the repository on the internet. Finally, Maven will automatically declare Classpath.
So we only need to declare all libraries which we want to use in “pom.xml”. The libraries are managed by Maven.
Local Repository
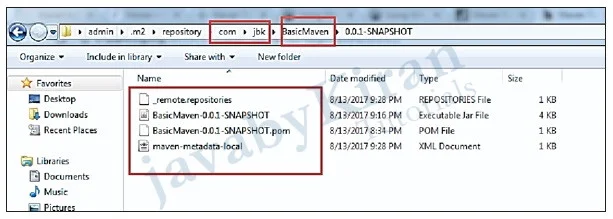
Where local repository located?
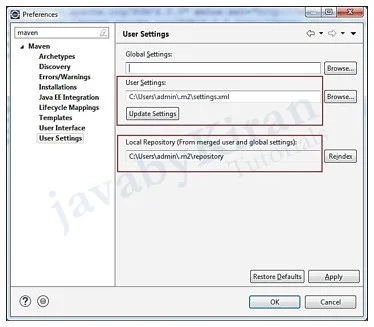
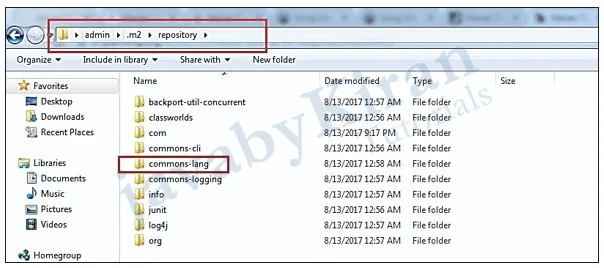

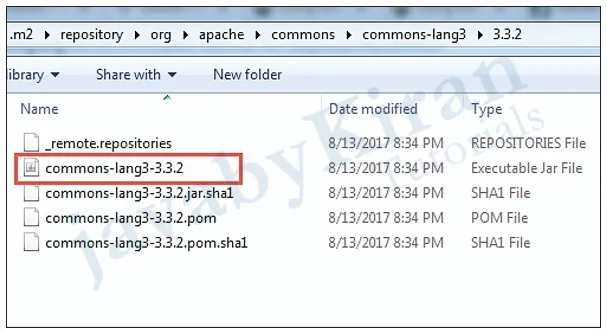
Now our project is included as a local repository.
Configuring Maven download source and javadoc
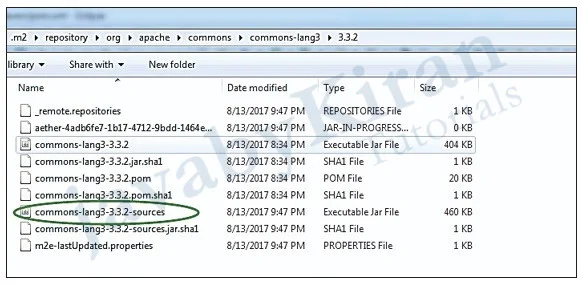
Normally Maven only download binary files. To Maven download the source and javadoc, you need to configure on Eclipse.
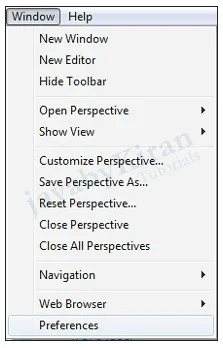
Go to Windows/Preferences

Change something in the pom.xml file and save (Or build project), Maven will download the source and javadoc.
The results you see on the Local Repository:
After this you will see in right bottom corner as:

Now we will see maven in detail again.
Write one simple junit test case and run.
Different goals in maven.
Other tags in pom.xml.